Last updated: June 26, 2024
Activate and deactivate multiple checks
Read this guide to learn how to activate or deactivate multiple data quality checks in the DQOps user interface.
Overview
In DQOps, you can activate, deactivate and modify data quality checks for tables and columns using the Check editor. However, if you need to perform these actions on multiple checks at once, you can use the multiple check editor. This feature can save you a lot of time simplifying repetitive actions of activating the same check on multiple tables or columns.
Activate and deactivate multiple checks
Navigate to the multiple check editor
To access the multiple (bulk) check editor, follow these steps:

-
Click on the Profiling, Monitoring checks or Partition checks section at the top of the screen.
-
On the tree view on the left, expand the relevant and select the schema.
-
Click on the Data quality checks tab on the main workspace.
You will now see the multiple check editor screen where you can search for the checks you would like to modify. If you are in the Monitoring checks or Partition checks section, you can also select the Daily checks and Monthly checks tabs.
Search the checks you would like to modify
To search for checks you wish to modify, follow these steps:

- Choose whether you want to modify Table or Column checks using the radiobuttons.
- Select the Check category and Check name from the dropdown menus.
- Optionally, you can set the filter by the Table name or Column name.
These fields support the use of the asterisk character * as a wildcard to substitute any number of characters. For example, pub* will find all tables name starting with "pub". The * character can be used at the beginning, in the middle or at the end of the name.
-
To include inactive checks in your search, select the Include also inactive checks checkbox.
-
Click the Search button to find checks matching selected criteria.
Search results
After the search, a table will be displayed containing the checks that match your search criteria.
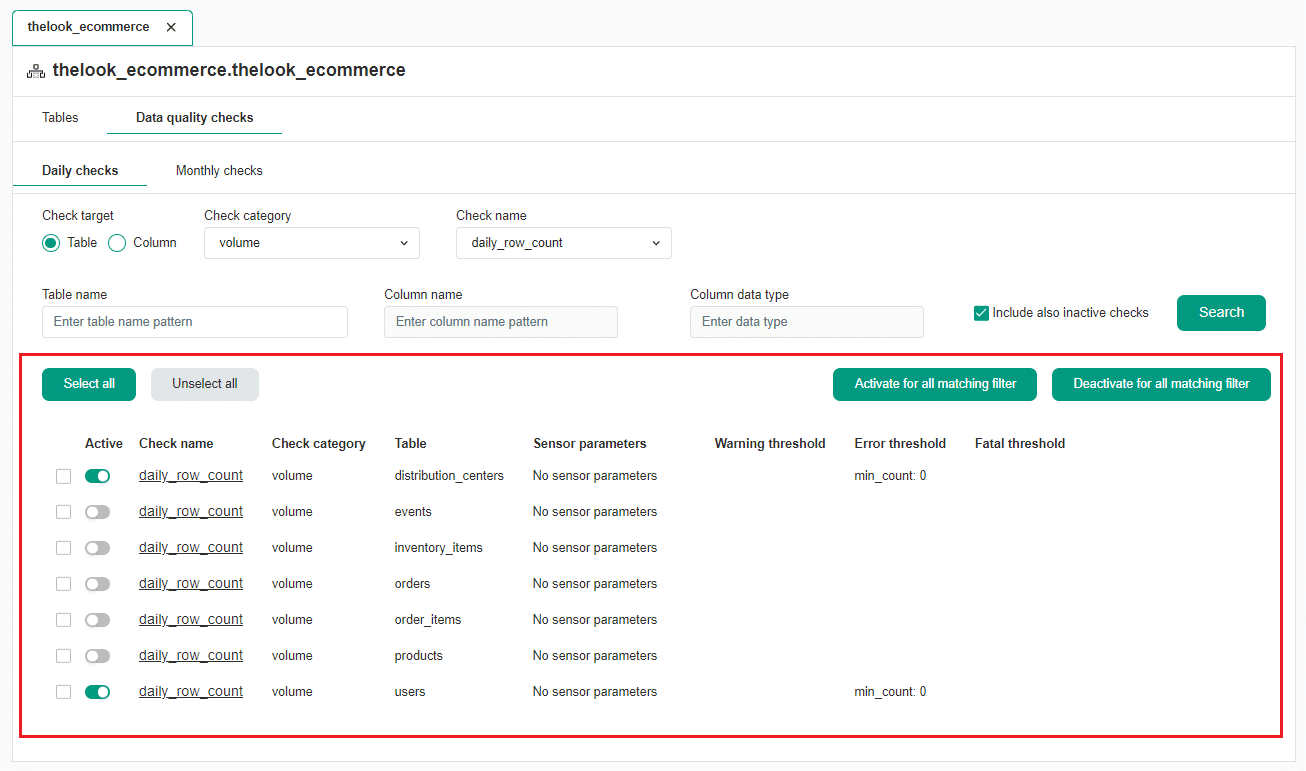
The table contains several columns that provide information about the status of each check, its name, category, associated table, associated columns (for column check search), sensor parameters (if applicable), and warning, error, and fatal threshold levels.
You can modify multiple checks by selecting the checkboxes in the table or modify all checks by clicking the "Select all" button.
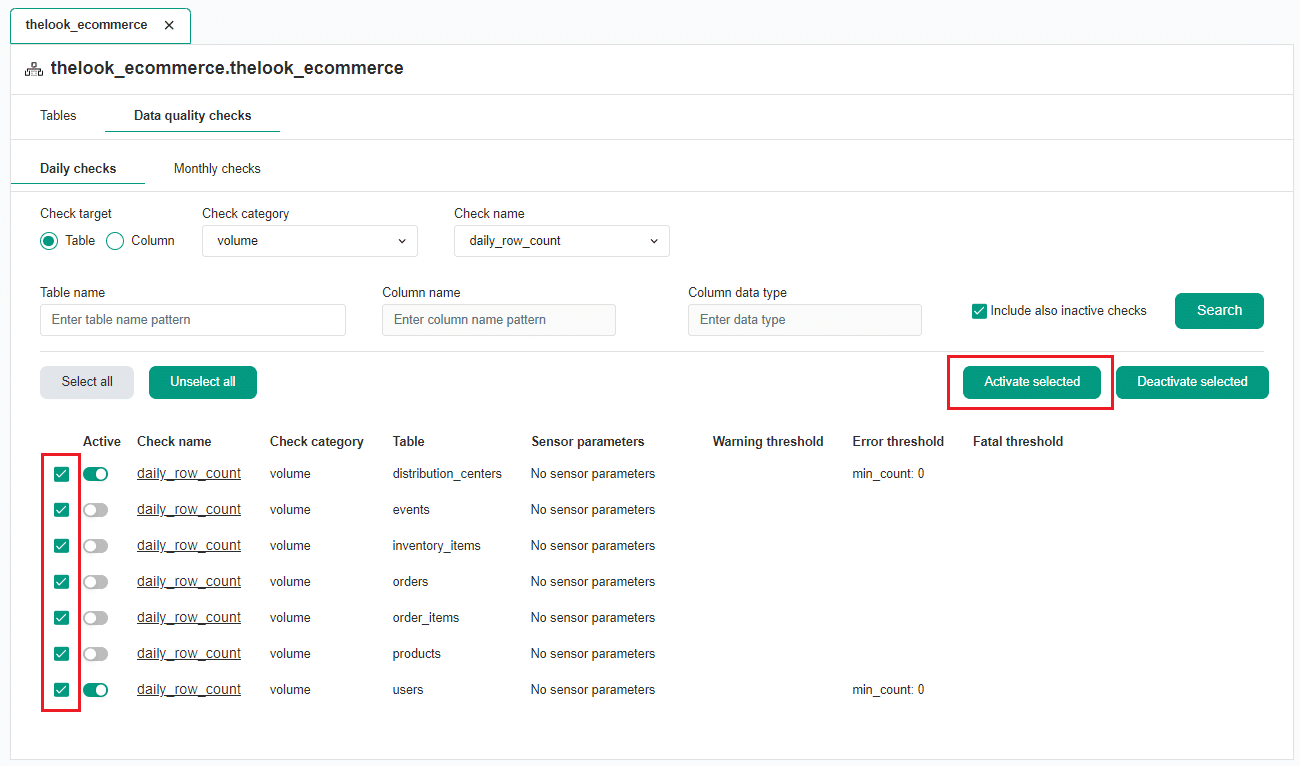
Activate multiple checks
To activate all checks, simply click on the Activate for all matching filter button on the left.
Alternatively, you can select specific checks using the checkboxes and activate them by clicking the Activate selected button.
This will open a screen where you can set the parameters and thresholds. Learn more about threshold levels.
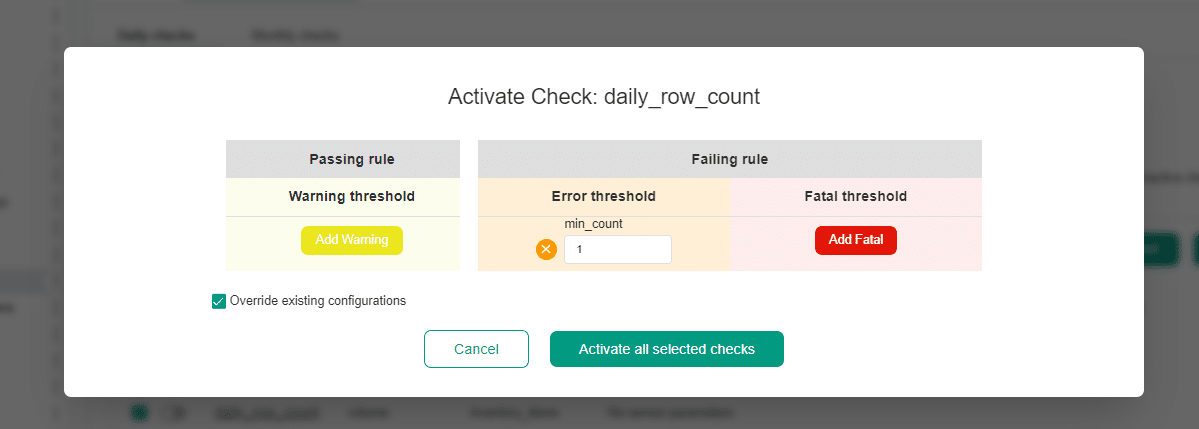
After setting the thresholds click on the Activate all selected check button.
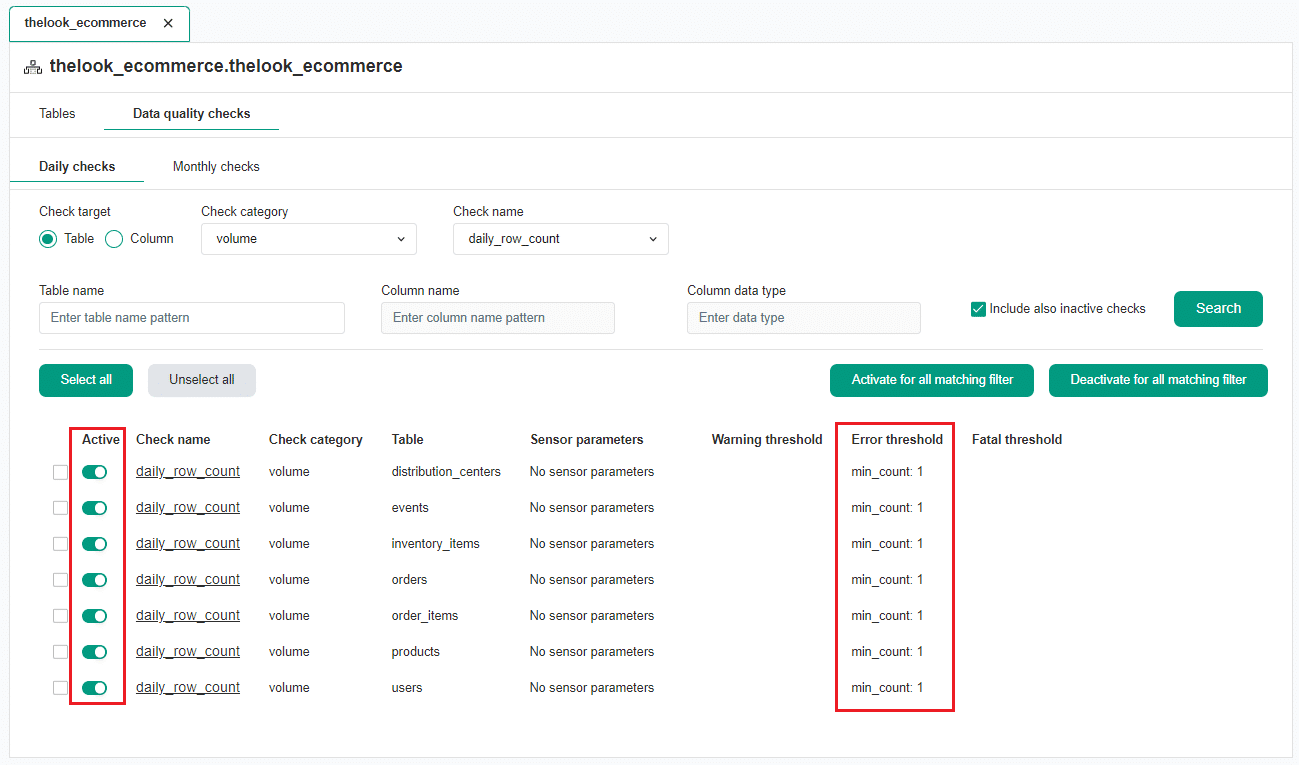
This will activate all the checks with the selected threshold level, as shown in the example below.
Deactivate multiple checks
To deactivate multiple checks that match the filter, you can use the button on the right Deactivate for all matching filter. Additionally, you can also select the checks that you want to deactivate using the checkboxes.
What's next
- Now you might want to check the detailed manual of how to run data quality checks using the check editor.
- With DQOps you can also compare tables between data sources. Read the manual about the table comparison (reconciliation).